Is your computer acting up again? That familiar sinking feeling when your trusty machine throws a tantrum – a blank screen, unexplained slowdowns, or a cacophony of beeps – can be incredibly frustrating. But before you panic and declare your device officially deceased, know this: many common computer woes can be resolved with some basic hardware checks and troubleshooting steps. Think of yourself as a digital detective, armed with a systematic approach to uncover and fix the mystery. This guide will empower you to tackle those hardware headaches with confidence, saving you time, money, and a whole lot of stress.
At a Glance: Your First Steps to Fixing Computer Problems
- Start Simple: Always begin by checking physical connections and power cycling your device. You'd be surprised how often this fixes things!
- Document Everything: Note down error messages, strange sounds, and what you've already tried. This is your troubleshooting diary.
- Listen to Your Tech: Pay attention to indicator lights, beeping codes, and unusual noises – they're often trying to tell you something.
- Look Inside (Carefully): A visual inspection can reveal loose cables, dust buildup, or even burnt components.
- Diagnostic Tools Are Your Friends: Utilize built-in and third-party software to pinpoint problems with RAM, hard drives, and more.
- Targeted Tests: Once you suspect a component, focus your efforts on testing and potentially replacing just that part.
- Preventative Care: Regular maintenance like cleaning and updating drivers can prevent many issues from arising in the first place.
Why Bother with Hardware Troubleshooting? You're More Capable Than You Think
Hardware troubleshooting isn't just for IT pros. It's a fundamental skill that every computer user can benefit from. At its core, it's a systematic process for diagnosing and fixing issues related to your computer's physical components. This methodical approach helps you quickly identify the root cause of a problem, minimizing disruption and downtime.
Imagine your computer suddenly refusing to boot. Without troubleshooting knowledge, your first instinct might be to rush it to a repair shop, incurring potentially hefty fees and waiting days for a fix. But by learning how to perform basic checks, you might discover it's simply a loose power cable or a faulty RAM stick you can replace yourself. This saves time, money, and gives you a greater sense of control over your technology. The ultimate goal? To get your hardware performing optimally again, or at least understand what's gone wrong before seeking professional help.
Your Troubleshooting Mindset: Think Like a Digital Detective
Effective troubleshooting isn't just about following a checklist; it's about adopting a problem-solving mindset. You're a detective, gathering clues and eliminating suspects. Here’s the general framework you’ll follow:
- Identify the Issue: What exactly is happening? Is the computer not turning on, freezing, making strange noises, or displaying an error message?
- Gather Information: What changed recently? Did you install new software, drop the laptop, or experience a power surge? What are the system's specs?
- Formulate a Hypothesis: Based on the symptoms, what's your best guess about the problem component?
- Test the Hypothesis: Implement a specific step to confirm or deny your theory. (e.g., "If it's the RAM, I'll try reseating it.")
- Implement a Solution: Once you've identified the culprit, apply the fix (e.g., replacing the faulty RAM).
- Verify Resolution: Did the fix work? Does the computer now operate normally?
This iterative process ensures you're not just blindly trying solutions but thoughtfully narrowing down possibilities.
The Essential Toolkit: What You'll Need (and Why)
While you won't need a full-blown electronics lab, having a few key items on hand can make hardware troubleshooting significantly easier.
Software Tools: The Virtual Sleuths
- HWiNFO: A comprehensive system information and diagnostics tool that provides deep insights into your hardware, temperatures, and sensor readings.
- MemTest86: A powerful memory testing tool that runs before your operating system boots, ideal for catching subtle RAM errors.
- CrystalDiskInfo / CHKDSK: These utilities help you assess the health of your hard drives (SSDs and HDDs). CrystalDiskInfo reads SMART data, while CHKDSK (built into Windows) scans for and attempts to fix file system errors.
- Windows Memory Diagnostic: Windows' built-in RAM checker, a good first step before MemTest86 for basic checks.
- Manufacturer Diagnostics: Many brands (like Dell with its Pre-boot System Assessment - PSA) include built-in diagnostic utilities accessible at boot-up. Consult your device manual for how to access these.
Physical Tools: The Hands-On Helpers
- Screwdriver Set: Essential for opening computer cases. A good precision set with various Philips and Torx bits is invaluable.
- Anti-static Wrist Strap: Crucial for preventing electrostatic discharge (ESD) when working inside your computer, which can damage sensitive components. Always connect it to an unpainted metal part of your case.
- Compressed Air: For blasting away dust from fans, heatsinks, and vents. Dust is a major enemy of hardware performance and longevity.
- Flashlight/Headlamp: Internal computer spaces can be dark, and a good light source helps you see those tricky connections.
- Multimeter (Optional, Advanced): For checking voltage output from your power supply. This is more for advanced diagnostics.
- Logic Probe / Soldering Iron (Highly Optional, Expert Level): These are for component-level repair and generally not part of basic troubleshooting.
Before You Dive In: Crucial Preliminary Steps
Before you even think about opening your computer case or running complex diagnostics, start with these fundamental, non-invasive checks. They often resolve issues surprisingly quickly.
A. Verify Physical Connections: The "Is It Plugged In?" Test
It sounds almost too simple, but loose or damaged cables are a shockingly common cause of computer problems.
- Power Cables: Ensure your computer's main power cable is securely plugged into both the back of the PC and the wall outlet (or power strip). If using a power strip, make sure it's switched on.
- Monitor Cables: Check the video cable (HDMI, DisplayPort, DVI, VGA) connection at both the monitor and the graphics card/motherboard. Try unplugging and re-plugging it firmly.
- Peripheral Cables: Are your keyboard, mouse, printer, external hard drives, and other USB devices properly connected? If a specific peripheral is acting up, try plugging it into a different USB port.
- Internal Cables (if accessible): If you're comfortable, a quick peek inside (with power off!) can confirm that internal data cables (SATA, power to drives) are snug.
- Inspect for Damage: While checking connections, look closely at the cables themselves. Are there any frayed wires, kinks, or bent pins on the connectors? A visibly damaged cable needs immediate replacement.
B. The Classic Power Cycle: A Digital Reset Button
The power cycle, often called a "hard reset" or "reboot," can clear temporary glitches, discharge residual power, and reset components to a known good state.
- Shut Down Completely: Don't just close the lid or put it to sleep. Perform a full shutdown from your operating system. If the computer is frozen, hold down the power button until it turns off (usually 5-10 seconds).
- Unplug Everything: Disconnect the main power cable from the wall outlet and the back of your computer. If it's a laptop, remove the battery if possible (though less common in modern laptops).
- Wait It Out: Crucially, wait at least 30 seconds. This allows capacitors to fully discharge any residual electrical charge that might be causing the issue.
- Reconnect and Power On: Plug the power cable back in (and reinsert the battery if applicable), then attempt to power on your device.
C. Document Everything: Your Troubleshooting Diary
This step is often overlooked but is incredibly valuable. Keeping a record helps you track your progress, avoid repeating steps, and provides crucial information if you need to escalate the problem to a professional.
- Note All Symptoms: What exactly is happening? "No display," "Blue Screen of Death (BSOD) with error code 0x000000D1," "loud clicking noise from the tower," "applications freezing after 10 minutes." Be specific.
- Record Error Messages: Take photos or screenshots of any error codes or messages. These are goldmines of information.
- List Steps Taken: "Checked power cable," "power cycled," "tried different monitor." This prevents wasted effort.
- When Did It Start? Did the problem begin after a software update, a power outage, or dropping the device? Context is key.
Diagnosing the Culprit: Pinpointing the Problem
Once preliminary steps are done, it's time to dig deeper. This involves listening, observing, and using diagnostic tools.
A. Read the Lights: Hardware Indicators
Your computer and its components often communicate their status through subtle visual cues.
- Power Lights: A steady green usually means normal operation. A blinking light might indicate sleep mode, while an orange or red light often signals a problem (e.g., no RAM detected, power supply issue).
- Hard Drive Activity Lights: A blinking light indicates data access. If it's constantly on or off when it shouldn't be, it could point to a drive issue.
- Motherboard LED Codes / Beep Codes: Many motherboards have small diagnostic LEDs that display numerical or alphabetical codes during boot-up. Consult your motherboard manual for their meaning. Similarly, a series of beeps (e.g., one long, two short) are BIOS beep codes that indicate specific hardware failures (often RAM, graphics card, or CPU). Knowing how to decipher common computer error codes like these can save you hours of guesswork.
B. Run the Docs: Diagnostic Tests
Software diagnostics are non-invasive ways to check the health of your internal components.
- Manufacturer's Diagnostics: Restart your computer and look for a key press (often F12, F2, DEL, or ESC) to enter a pre-boot environment. Here, you might find built-in hardware tests (like Dell's PSA). These are excellent for basic checks of CPU, memory, and storage before Windows even loads.
- Windows Memory Diagnostic: Type "Windows Memory Diagnostic" into your Windows search bar. This utility will restart your computer and perform a basic check on your RAM. If it finds errors, it will usually notify you upon returning to Windows.
- CHKDSK: To check your hard drive, open Command Prompt as an administrator and type
chkdsk /f /r(then press Y if prompted to schedule on next reboot). This scans for bad sectors and file system errors. - CrystalDiskInfo: A third-party tool that reads your hard drive's SMART (Self-Monitoring, Analysis and Reporting Technology) data. This can give you an early warning if your hard drive is failing, indicating "Good," "Caution," or "Bad" status.
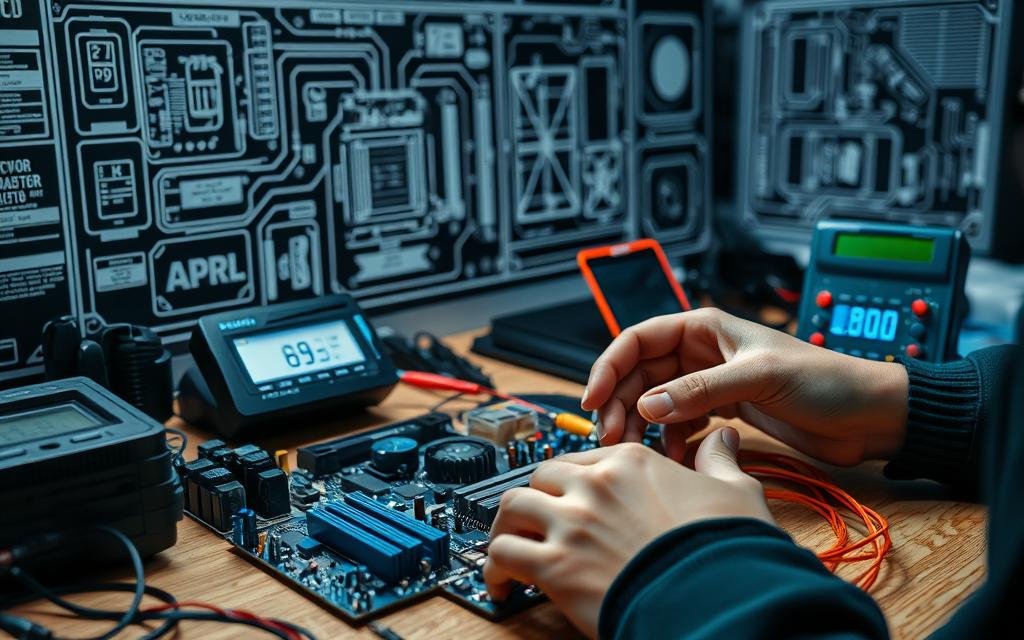
C. The Visual Inspection: Open Up (Carefully!)
If software diagnostics are inconclusive, a physical inspection inside the case is the next step. Always power off and unplug your computer before opening the case. Wear your anti-static wrist strap!
- Loose Cables: Re-check all internal power and data cables, especially those connected to the motherboard, hard drives, and graphics card. Gently but firmly push them in to ensure they are fully seated.
- Improperly Seated Components: RAM modules and graphics cards can sometimes work their way loose. Gently press down on both ends of RAM sticks until you hear a click, ensuring they are fully seated in their slots. Do the same for your graphics card (make sure the locking clip engages).
- Signs of Overheating: Look for discolored areas on the motherboard or other components, particularly around capacitors or power delivery systems. A burnt smell is another strong indicator of overheating.
- Burnt Components: Any component that looks visibly charred or swollen, especially capacitors, usually indicates a failure and requires replacement.
- Dust Buildup: Excessive dust acts as an insulator, trapping heat and hindering airflow. Use compressed air to clean out dust from fans, heatsinks (CPU, GPU), and case vents. A build-up of dust can severely hamper your cooling system.
Deep Dive: Targeting Specific Components & Solutions
Now, let's zero in on common problem areas and how to troubleshoot them.
1. Power Supply Unit (PSU): The Heartbeat of Your PC
A failing power supply can manifest in myriad ways: random shutdowns, failure to boot, or components not receiving enough power.
- Symptoms: No power, intermittent power, system freezing, strange electrical smell.
- Checks:
- Ensure the PSU's fan is spinning when the PC is on. If not, it's likely dead.
- If you have a multimeter (and know how to use it safely), you can test the voltage output from the PSU's connectors. There are various guides online for specific pinouts. If voltages are incorrect or inconsistent, the PSU is suspect.
- Solution: Replace the power supply. Ensure the new PSU meets or exceeds your system's wattage requirements and has the necessary connectors. It's often safer and simpler to replace the entire unit rather than attempt repairs. Making sure you choose the right power supply with sufficient wattage is critical for system stability.
2. Cooling System: Keeping Your Cool
Overheating can lead to system instability, slowdowns, and even permanent damage.
- Symptoms: System shutdowns, loud fan noise, lagging performance under load, hot-to-the-touch casing.
- Checks:
- Listen for fans: Are they spinning? Are they making grinding noises?
- Visually inspect: Are CPU and GPU fans clean and unobstructed? Are heatsinks caked with dust?
- Software monitoring: Use HWiNFO or similar tools to monitor CPU and GPU temperatures.
- Solution:
- Clean out dust with compressed air, paying special attention to CPU and GPU heatsinks and case fans.
- Ensure all fans are connected and spinning. Replace any noisy or non-functional fans.
- Consider reapplying thermal paste to the CPU (advanced, if temperatures are still high after cleaning).
3. BIOS/UEFI Settings: Your System's Core Configuration
Incorrect BIOS/UEFI settings can prevent booting, misconfigure hardware, or lead to performance issues.
- Symptoms: Failure to boot, incorrect boot order, hardware not detected, system instability.
- Checks:
- Enter BIOS/UEFI during boot (usually by pressing DEL, F2, F10, or F12).
- Look for incorrect boot order, disabled hardware components, or incorrect RAM timings.
- Solution: If you're unsure, try loading "Optimized Defaults" or "Factory Defaults" within the BIOS/UEFI settings. Save and exit. This often resolves configuration-related boot issues.
4. RAM (System Memory): The Brain's Workspace
Faulty RAM is a common cause of blue screens, crashes, and system instability.
- Symptoms: Blue Screen of Death (BSOD), random reboots, system freezes, failure to boot with specific beep codes.
- Checks:
- Run memory diagnostic tools like Windows Memory Diagnostic or the more thorough MemTest86.
- If you have multiple RAM sticks, try booting with one stick at a time to identify the faulty module.
- Solution:
- Reseat RAM: Power off, unplug, open the case, unclip the RAM modules, remove them, and then firmly reinsert them until they click into place.
- Replace RAM: If a diagnostic tool identifies a specific module as faulty, replace it with new, compatible RAM. Ensure the new RAM matches the type, speed, and capacity of your existing modules.
5. Device Drivers: The Language of Hardware
Drivers are software that allows your operating system to communicate with your hardware. Outdated, corrupted, or incompatible drivers can cause a wide array of problems.
- Symptoms: Hardware (e.g., graphics card, Wi-Fi, printer) not working, intermittent issues, crashes, poor performance.
- Checks:
- Device Manager: Open Device Manager (search for it in Windows). Look for any devices with a yellow exclamation mark or red X, indicating a problem.
- Event Viewer: Check Windows Event Viewer for driver-related errors.
- Solution:
- Update Drivers: Visit the manufacturer's website for the specific hardware (e.g., NVIDIA, AMD for graphics; Intel for chipset) and download the latest drivers.
- Reinstall Drivers: If an update doesn't help, try uninstalling the problematic driver from Device Manager (check "Delete the driver software for this device" if prompted), then reinstalling the latest version.
- Roll Back Driver: If a problem started after a driver update, you can try rolling back the driver to a previous version via Device Manager.
6. Hard Drive/SSD: Your Digital Filing Cabinet
Storage device failure can lead to data loss, slow performance, and failure to boot.
- Symptoms: System fails to boot (missing operating system error), extremely slow performance, applications crashing, unusual noises (clicking, grinding, buzzing for HDDs).
- Checks:
- Listen for Noises: For traditional HDDs, clicking, grinding, or buzzing often indicates mechanical failure.
- Run Disk Health Checks: Use CrystalDiskInfo to check SMART data for health status. Run CHKDSK to scan for errors.
- Boot Order: Ensure your drive is listed in the BIOS/UEFI boot order and is set as the primary boot device.
- Solution:
- Back up data IMMEDIATELY: If you hear strange noises or CrystalDiskInfo reports "Caution" or "Bad," your drive is failing. Prioritize data backup. Learn about best practices for data recovery before it's too late.
- Replace Drive: A failing hard drive or SSD needs to be replaced. After replacement, you'll need to reinstall your operating system.
- Reseat Cables: Ensure the SATA data and power cables are securely connected to both the drive and the motherboard/PSU.
7. Graphics Card & Monitor: Your Window to the World
Display issues can stem from the monitor, the cable, or the graphics card itself.
- Symptoms: No display, distorted image, flickering screen, "no signal" message, black screen, artifacts on screen.
- Checks:
- Test Monitor: Connect your monitor to a different computer or a different input source (e.g., a game console) to rule out the monitor as the problem.
- Test Cable: Try a different video cable (HDMI, DisplayPort, etc.).
- Integrated Graphics: If your CPU has integrated graphics, remove your dedicated graphics card and connect your monitor to the motherboard's video output to see if you get a display.
- Reseat Graphics Card: Power off, unplug, open the case, unclip and remove the graphics card, then firmly reinsert it, ensuring the PCIe power cables are also connected.
- Solution:
- If the monitor or cable is faulty, replace it.
- If the graphics card is identified as the problem, ensure its drivers are updated. If problems persist, the card may need to be replaced. If you're seeing a blank or garbled display, remember troubleshooting steps for specific devices, like learning how to fix your glitchy Chromebook screen can offer relevant insights into display issues.
8. System Integrity: Malicious Code & Conflicts
Sometimes, what appears to be a hardware problem is actually software-related.
- Symptoms: Slowdowns, crashes, unexpected pop-ups, unusual network activity, hardware devices not recognized.
- Checks:
- Virus/Malware Scan: Run a full scan with reputable antivirus software.
- Hardware Conflicts (Device Manager): Look for yellow exclamation marks or red Xs. These can indicate driver conflicts or resource issues.
- Solution:
- Remove Malware: Follow steps to remove any detected viruses or malware. Don't let malware slow you down; regular scans can help you optimize your PC's performance.
- Resolve Conflicts: Update drivers, roll back drivers, or uninstall conflicting software.
9. Peripheral Devices: The External Helpers
Printers, keyboards, mice, webcams – these external devices can cause problems if they malfunction.
- Symptoms: Specific peripheral not working, system freezing when connected, error messages related to the device.
- Checks:
- Test with Another Port/Device: Try plugging the peripheral into a different USB port on your computer. If possible, try it on another computer to see if the problem persists.
- Different Peripheral: If your mouse isn't working, try a different mouse.
- Solution:
- Update/Reinstall Drivers: Go to the peripheral manufacturer's website for the latest drivers.
- Replace Device: If the peripheral works on another computer but not yours (after driver troubleshooting), it might be a port issue on your PC. If it doesn't work anywhere, the peripheral itself is likely faulty.
When All Else Fails: Common Questions & Misconceptions
Even with a systematic approach, some issues remain tricky. Here are answers to common questions.
"My computer just makes beeping noises and won't boot. What does that mean?"
Those beeps are BIOS (Basic Input/Output System) or UEFI (Unified Extensible Firmware Interface) POST (Power-On Self-Test) codes. They're trying to tell you which hardware component failed the initial boot tests. The specific pattern (e.g., 1 long, 2 short beeps) corresponds to a particular error. You'll need to consult your motherboard's manual or the manufacturer's website to decipher what the beeps mean for your specific system. Common culprits are RAM, graphics card, or CPU.
"Should I just replace my whole computer if one part breaks?"
Not necessarily! Replacing a single component like a power supply, RAM stick, or hard drive is often much cheaper and simpler than buying a whole new system. Use your troubleshooting to identify the specific faulty part. If it's the motherboard or CPU, the cost-benefit analysis might lean towards replacement, but for individual components, repair is often viable.
"Is it safe for me to open my computer case?"
Yes, but with precautions. Always power off and unplug your computer first. Then, wear an anti-static wrist strap (connected to an unpainted metal part of the case) to prevent static electricity from damaging sensitive internal components. Avoid touching circuit boards directly; handle components by their edges. If you're unsure or uncomfortable, it's better to seek professional help. Also, be aware that opening certain devices (especially laptops) might void their warranty.
The Finish Line: Confirming & Preventing Future Headaches
You've put in the work, identified the problem, and implemented a fix. But you're not done yet!
A. Verify Resolution: Did You Really Fix It?
Don't just assume the problem is gone. Rigorously test your system.
- Revisit Symptoms: Go back to your documented problem description. Have all original symptoms been addressed?
- Test Affected Hardware: Run another round of diagnostics on the component you fixed or replaced.
- Stress Tests: Use tools like Prime95 (for CPU/RAM) or FurMark (for GPU) to put your system under load and ensure stability. Monitor temperatures during these tests.
- Performance Checks: Confirm that your computer is performing as expected – no more slowdowns, crashes, or glitches.
B. Document the Solution: Your Future Self Will Thank You
Update your troubleshooting diary with the final solution.
- Detailed Steps: What exactly did you do to fix it?
- Methodology: What tests confirmed the problem?
- Final Resolution: Clearly state what the problem was and how it was fixed.
This documentation builds your personal knowledge base, making future troubleshooting faster and more efficient. If you're working with a team, share these findings to help everyone learn and prevent similar issues.
C. Preventive Maintenance: An Ounce of Prevention
Many hardware problems can be avoided with regular upkeep.
- Scheduled Hardware Checks: Every 6-12 months, give your computer a quick once-over. Inspect physical connections, clean dust from internal components with compressed air, and ensure fans are spinning freely.
- Firmware and Driver Updates: Regularly check for and install updates for your motherboard's BIOS/UEFI, graphics card drivers, and other critical hardware components. These updates often include bug fixes, performance improvements, and compatibility enhancements. Implementing proactive preventive maintenance keeps your system running smoothly and can head off many common hardware issues.
- Software Hygiene: Keep your operating system updated, run regular antivirus scans, and uninstall unnecessary software to reduce potential conflicts.
Empowering Your Inner Tech Whiz: Moving Forward
Congratulations! By following these basic hardware checks and troubleshooting steps, you've taken a significant stride toward becoming a more self-reliant computer user. You now have the framework to diagnose and potentially fix a wide range of hardware issues. Remember, every problem solved builds your confidence and expertise. Don't be afraid to experiment (safely, with power off!), learn from online resources, and approach each challenge with that detective's mindset. Your computer, and your wallet, will thank you.